
Some food, some drink.
A Simple Method for Making a Four-Layer Chocolate Cake with One Pan.
Abstract:
Now that both kids are in school and I'm doing more consulting work than ever, it's getting tougher to strike that balance between daily demands and family time. All the same, I will always pump the brakes for birthday cakes. This time however, I didn't leave myself with much stopping distance, and I needed an easy from-scratch birthday cake that presented well and tasted just as good. Chocolate sheet cakes are tasty and easy; and with a simple trick and a minimum of kitchen tools, you can transform one into a four layer spectacle that you'll be proud to present at a loved-one's birthday spread.
Purpose:
This year, I figured that I'd try the direct approach. So I asked my wife -
"What kind of cake do you want for your birthday?"
...and she says,
"Chocolate's good."
Wow, so much for a little guidance. She'd be the first to tell you that a box cake woulda been fine, but even though we've been especially short on time in general as of late, I thought my significant other still deserved more than an off the shelf cake on her birthday. All the same, I needed something accessible; and one night while letting the dvr steal time from my life I saw an episode of America's Test Kitchen where a lowly carrot sheet cake was reconstructed into a four-layered frosted wonder. It's about that time that the light bulb clicked. My Grandma's chocolate sheet cake recipe is pretty good (hell, who's Grandma's isn't?) and maybe I could do a chocolate variation on ATK's theme. While assembling my recipe, I happened upon a chocolate cake recipe using stout. I looked in the fridge, found a porter and thought, "eh what the hell?" Can't have a party without beer, right?
Recipe: Jump to the detailed recipe. (or, keep reading for the gist of it) -
Cake
Frosting
For the Cake Baking -
Preheat oven to 350F. Melt the two sticks of butter in a saucepan over medium heat. Whisk in cocoa, salt & beer while bringing to a boil (still over medium heat). In your mixing bowl, whisk flour, baking soda, and sugar. With your mixer on stir, incorporate the hot mess in the saucepan into the dry goods. Once it's together, (about 2 minutes), add buttermilk, slightly beaten eggs, and vanilla and continue to stir for another 2 minutes. Grease the bottom of a half sheet pan and line it with a sheet of parchment, then grease and flour the pan with the parchment in place. Pour the cake batter into the pan, distribute evenly with a spatula, and bake for 25 minutes or until the toothpick test is passed. Cool the cake on a wire rack for 15 minutes, then loosen the edges with the reverse edge of a butter knife. Carefully invert the cake onto a wire rack (do NOT remove the parchment), then take a deep breath and then re-invert onto a second wire rack. Cool the cake completely, then bundle it up in plastic wrap and freeze until it's time to assemble.
For the Frosting -
Back to the stand mixer with the whisk attachment (and a clean bowl), dump in the butter, vanilla, milk, sour cream, and cocoa. Mix on medium speed until integrated, then slow to a stir and gradually add the powdered sugar. Once it's all in there, scrape the bowl, then crank the mixer back up to medium for about 3 minutes to finish. You'll know it's done when the frosting is smooth and lightens in color (don't over-mix).
To Decorate -
Get the cake out of the freezer and put it on a cutting board parchment-side down (you did leave the parchment on, right?). Using the biggest chef's knife you got, cut the cake into 4 equal rectangles, roughly 6" x 8" (there's no shame in getting out a ruler). Onto your cake delivery vessel (or plate) place the first cake layer parchment side UP. Carefully remove the parchment, and using an offset spatula spread on about 2/3 cup of frosting. Keep a tall vessel of warm water around in which to dip your spatula to ensure easier spreadage. Repeat the stacking / frosting process with layers two and three, but for the last layer frost with 3/4 cup of frosting on the top. Use what remains to even out the sides. Top with M&Ms and then add a little frou-frou to the base and edges with any remaining frosting.
Observation:
- Grandma's recipe called for water (boooor-ing), but in this case, I've used beer. If you're a teetotaling type, then you could do what I normally do for this sheet cake and use strong coffee. The chocolate flavor will be richer; almost akin to hot fudge.
-
Also, there are a few tools that you should have in your arsenal to make this baking affair an easy one. While not necessary, in retrospect I can tell you that your life will be much simpler with them, and none of the following are one-trick ponies in the kitchen:
- Sheet pans; specifically, half sheet pans. If you don't have 'em already it's time to invest. Look for a good heavy-gauge aluminum pan with none of that non-stick baloney. A rolled edge is good, and a steel wire tucked under said edge can give even more structure and minimize warpage on the pan's thermal travels. Go with something food service-grade if you can. I have two such pans, but if someone bought me two more, I'd certainly find use of them.
- Half-sheet sized cooling racks. The toughest part of this recipe is de-panning the cake, and by having wire racks that fit your sheet pans exactly, failure is nearly impossible (assuming that you've properly prepped your pan). Stay away from the powder-coated or non-stick crap here, as you want something durable that is as at home in the oven cooking bacon as it is out on the counter cooling Christmas cookies. If you're in for two, you might as well be in for four. These buggers are handy as hell.
- If you wanna spread frosting on a cake, a butter knife ain't gonna cut it. You gotta have an offset spatula. I keep a big one around for such occasions, but honestly, I need to break down and buy a smaller one too for touch-ups and detail work. (Next time I buy, I'll know better).
- A big ol' knife. While not entirely necessary, having a 10-inch chef's knife that'll split a cake in half in nearly one swing makes for exact layer cutting and portioning of the finished product alike. When serving, be sure to dip the knife in warm water between cuts for clean, professional-looking slices.
Results:
So sure, it ain't no dolphin cake; but you gotta admit, it still looks pretty good for the small amount of time involved. If you're one of those folks who like a deep, dark, rich chocolate cake, you need to look elsewhere. This chocolate cake is more for the Hershey bar crowd (which fits my Mrs. to a T). This cake as made is really (and I mean really) sweet. I think frosting the sides may have sent it over the top; and while covering the sides with toasted nuts instead is certainly a swell idea, I really didn't feel like giving my lovely wife anaphylaxis for her birthday when she's so clearly been hinting at jewelery. Anyhow, if you're not one for a lotta frosting, just slice the cake thin and eat your piece from the inside out. The great thing about this cake is that it looks and tastes like a stereotypical chocolate birthday cake should; sweet first, chocolate second, with an emphasis on buttercream and pageantry. And the best part is that you get a lot of display points for not a lot of work (at least where cake decorating is concerned).
I'm the farthest thing from a professional cake decorator. These kind of departures take me a long-ass time to complete, so shortcuts are always welcome; and I gotta say that although this cake comes together pretty easily, it's certainly nothing you'd be ashamed to serve to company.
Gallery:
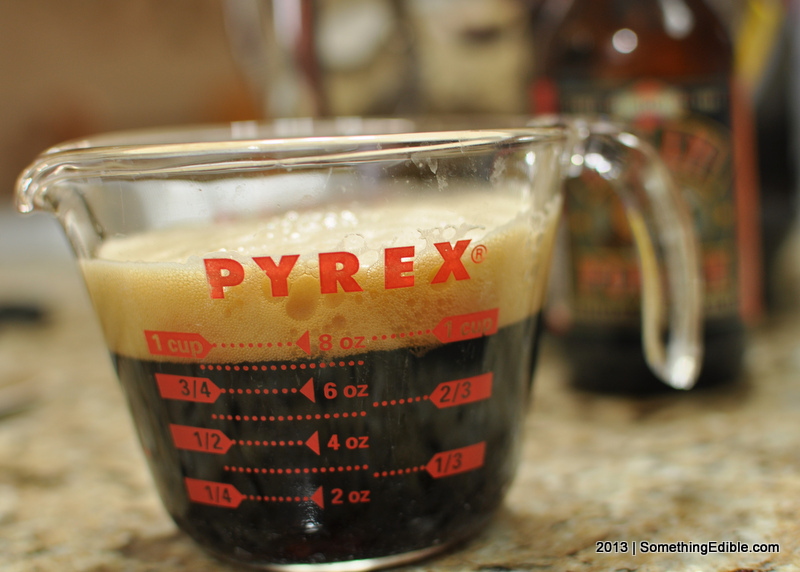
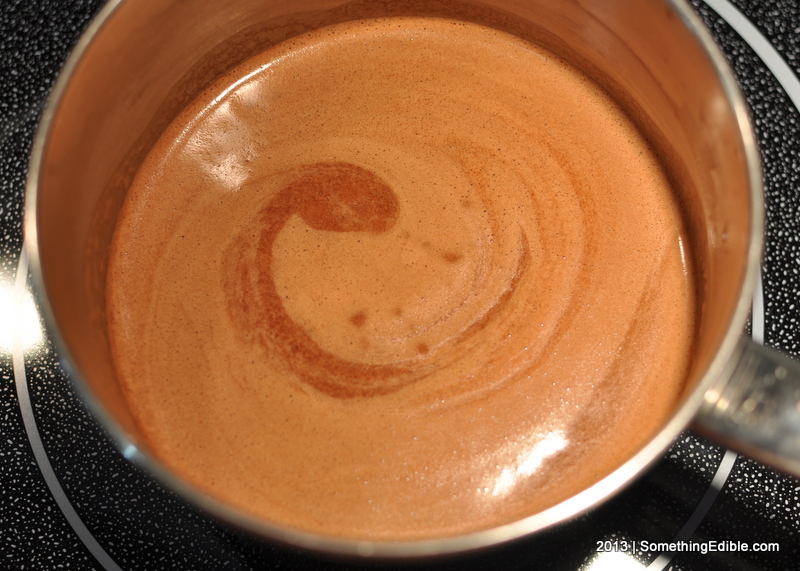
Now it's a party. I used porter for this cake, but a stout or even strong coffee would work.
Now it's a party. I used porter for this cake, but a stout or even strong coffee would work.
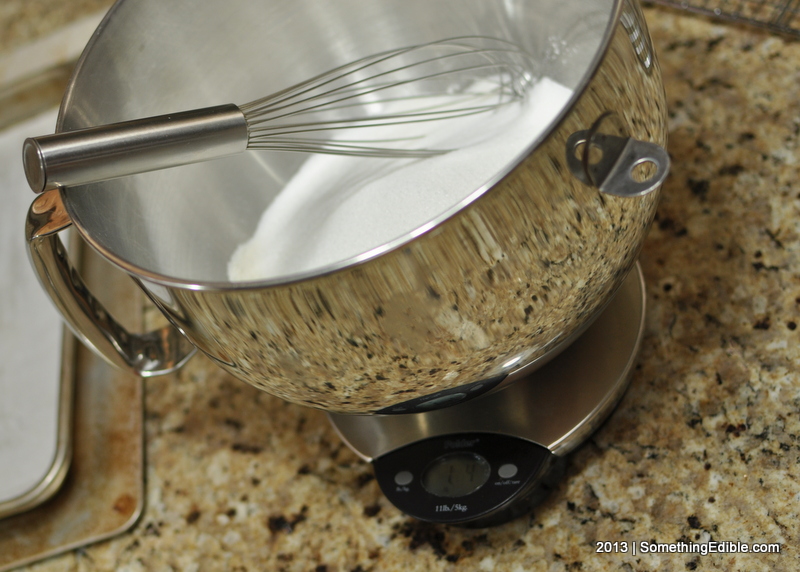
I can't stand doing dishes. Dump and go with a single cup if you have a good scale.
I can't stand doing dishes. Dump and go with a single cup if you have a good scale.
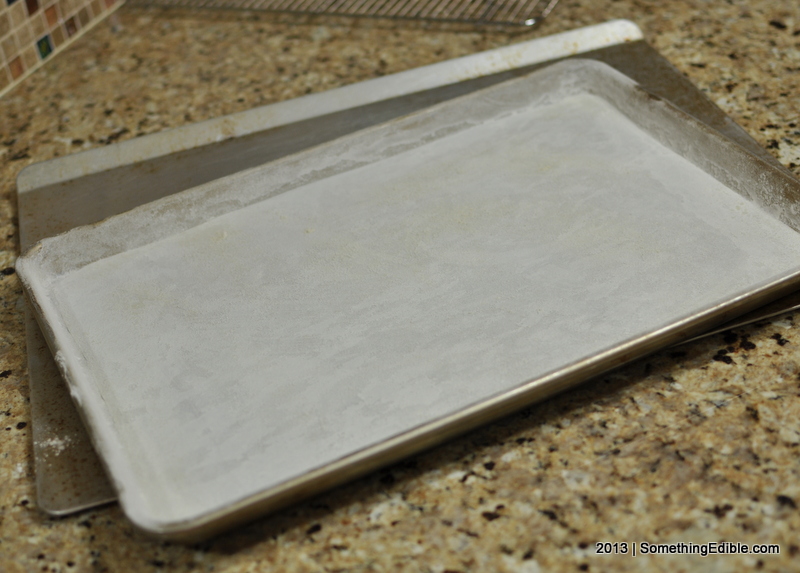
Don't take shortcuts when prepping your sheet pan. There's no going back if you screw it up.
Don't take shortcuts when prepping your sheet pan. There's no going back if you screw it up.
Butter, beer, cocoa. Smells fantastic. Get into my cake!
Butter, beer, cocoa. Smells fantastic. Get into my cake!
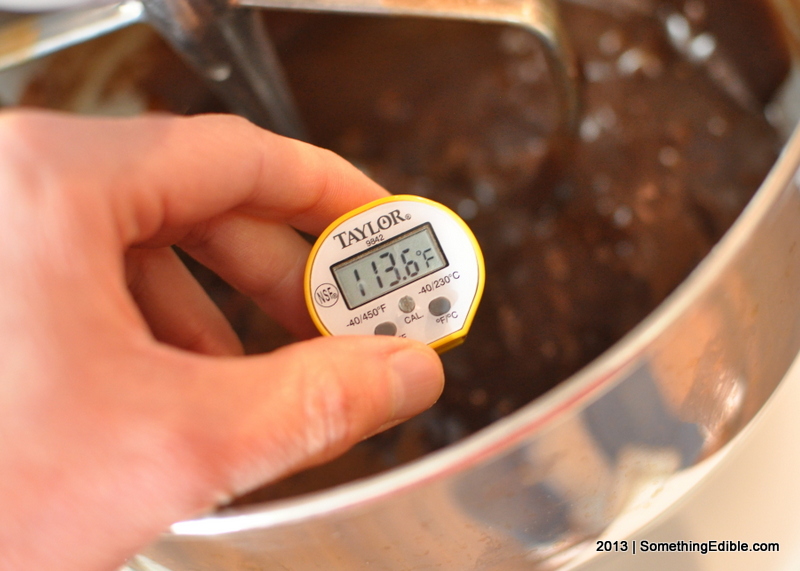
Beaten eggs will set at around 160F so I had to check temp before adding 'em in. Scrambled egg cake is nas-tay.
Beaten eggs will set at around 160F so I had to check temp before adding 'em in. Scrambled egg cake is nas-tay.

If the cake still looks this good after I de-pan, I'll be doing all right.
If the cake still looks this good after I de-pan, I'll be doing all right.

I rolled my own cake board. Duct tape seems to be the only thing I can get to stick to parchment.
I rolled my own cake board. Duct tape seems to be the only thing I can get to stick to parchment.
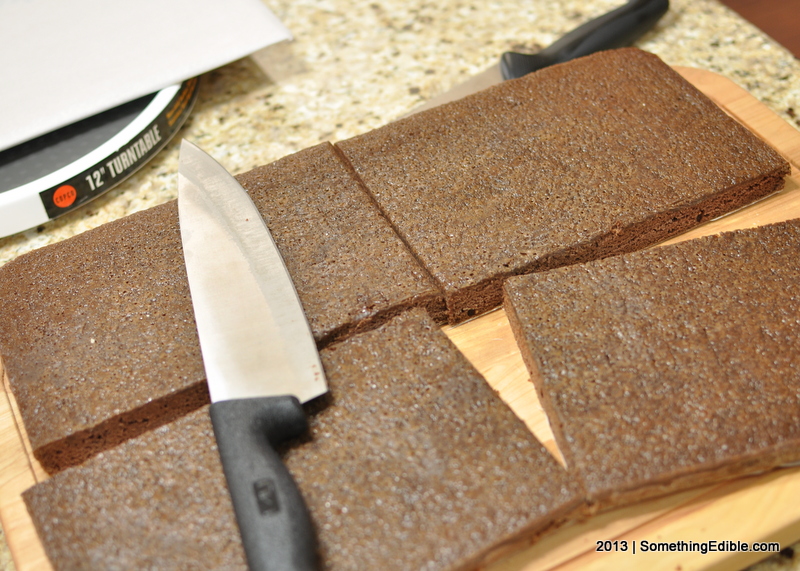
Cake cutting made easy; courtesy of big-ass chef's knife.
Cake cutting made easy; courtesy of big-ass chef's knife.
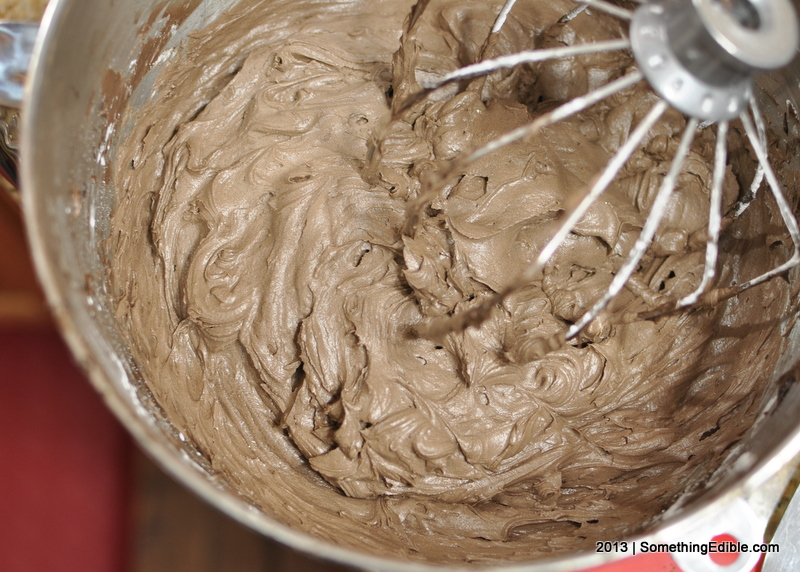
This is the shade of chocolate you're looking for that'll let you know your frosting's been whipped enough.
This is the shade of chocolate you're looking for that'll let you know your frosting's been whipped enough.
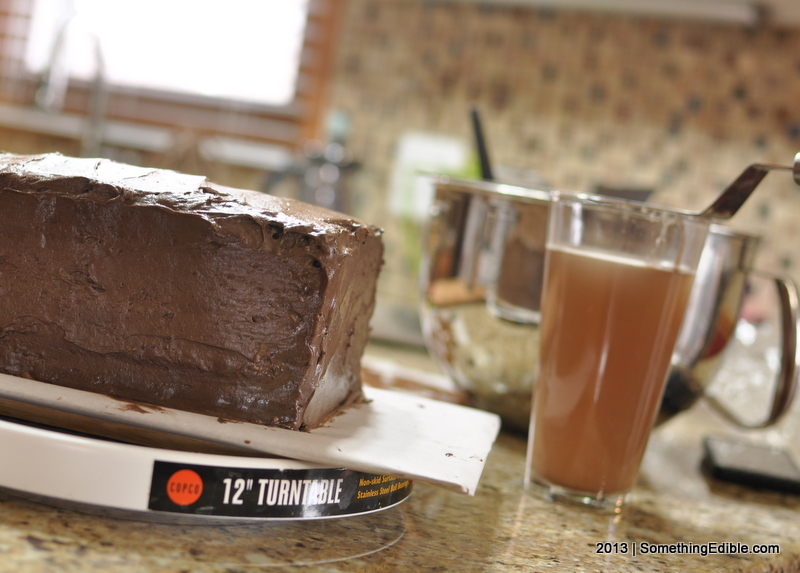
I don't frost a cake without a glass of warm water at the ready to tame that sticky buttercream.
I don't frost a cake without a glass of warm water at the ready to tame that sticky buttercream.
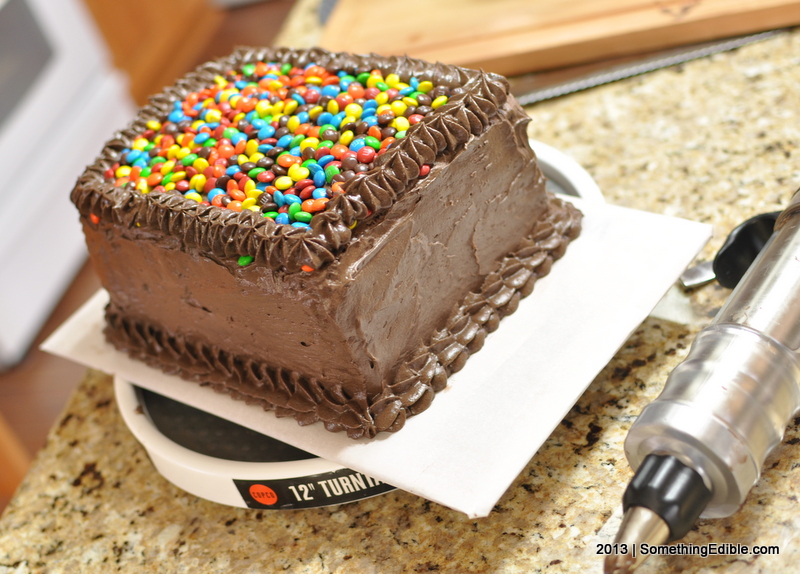
There's just enough frosting in this recipe to get it done. I still need to tend to those rogue M&Ms.
There's just enough frosting in this recipe to get it done. I still need to tend to those rogue M&Ms.
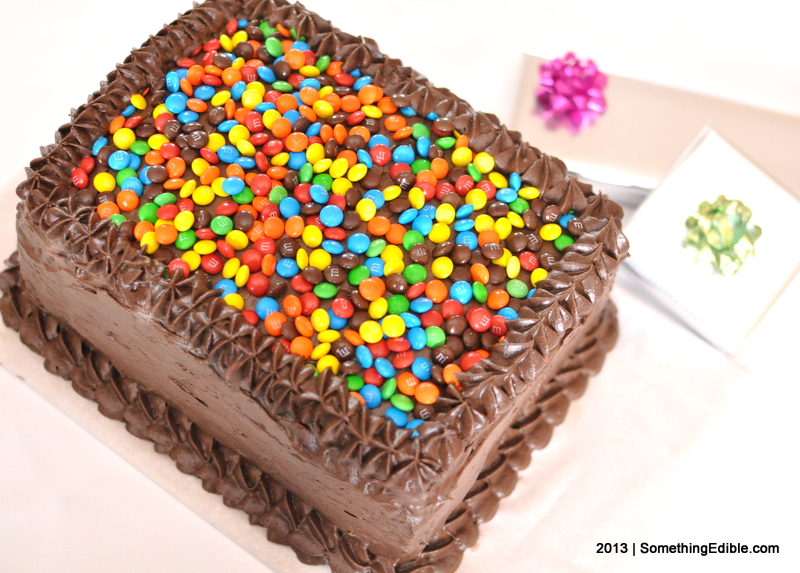
Here 'tis - A great looking four layer chocolate cake derived from a lowly sheet cake. Ghetto fabulous!
Here 'tis - A great looking four layer chocolate cake derived from a lowly sheet cake. Ghetto fabulous!

Honestly, I thought this cake was almost too sweet, but apparently that's a dissenting vote.
Honestly, I thought this cake was almost too sweet, but apparently that's a dissenting vote.
Get Social
Please wait while my tweets load...
Get the latest recipes and news. Join our Facebook page!


