
Some food, some drink.
Those that can’t drink brew: Do-It-Yourself Ginger Beer Step-by-Step.
Abstract: You can go ahead and add Ginger Beer to the ever-growing list of simple luxuries that are tough to find in rural northwest Kansas. Fortunately for me, almost all the components necessary for a small batch are easily accessible at the local supermarket. If you've never done any home brewing, this is a simple way to get your foot in the door with a can't-screw-it-up recipe for diy ginger beer.
Purpose: The first time ginger beer became important to
me, I was looking for something to do with a bottle of rum. It's at
this time that I chanced upon the recipe for a dark and stormy, which
sounded great; except for the fact that I had neither dark
rum, nor ginger beer, which pretty much made that idea a wash. Not
being able to presently mix that drink made me want it even more (I
have control issues).
Where I live, bottled ginger beer is nowhere to be found.
Rural living can be inconvenient at times, but it also encourages
ingenuity; so once again I've been put in in a do-it-yourself
situation. I started doing research, found a couple of recipes that
focused on details and procedure, and set out to make my mixer. Most of
what I needed was available locally, with the exception of Champagne
yeast. I knew I had a friend coming to visit from the big city, so I
had him pick me up a couple of packets from his local brewing store.
The next time company came to call, they'd be rewarded with a proper
dark and stormy.
Recipe: Jump to the detailed recipe. (or, keep reading for the gist of it) -
Special Equipment
Run the sliced ginger thru a mini-prep or food processor, adding some of the first 16oz of water was needed to achieve an even consistency. Add processed ginger, bay, sugar, and the rest of the initial 16oz of water into a saucepan over medium heat. Bring to a simmer & then continue to simmer for another 10 minutes, stirring occasionally. At the end of the simmer, strain thru a couple of layers of cheesecloth, squeezing out any additional liquid. Add lemon juice & allow to cool a bit. You'll be shooting for 90ishF or lower here.
While flavor base is cooling, clean the bottles and tops using hot water laced with about a half tsp of cleaner for each bottle. Rinse thoroughly, and re-cap loosely to keep the innards clean.
Check temperature of flavor base. If it's under 90F, add equal parts to the two clean bottles and add enough filtered water to each to leave about 2 inches of gap in the top of the bottle. Add the pinch of yeast for each. Btw, i'm talking a real pinch here; like a “line the bottom of a 1/8 tsp measure” pinch. Cap tightly and leave at room temperature for two days. After that, store in the fridge to halt the yeast reaction. Use within a week of making for best flavor.
Observation:
- Champagne yeast is cheap if you can find a local place to buy from. You don't need much, and shipping can kill you; so If you can't find any, and you've got friends that can hook you up (via delivery or even thru the mail), utilize those resources.
- Clean, clean, clean! Much like yogurt-making you've got to get rid of anything that could prevent the good microbes from doing their thing. You'll want something without goofy perfumes and you'll need it to be chlorine-free.
- It is possible to bottle this in those flip-cap glass bottles, but a plastic one liter bottle is cheap, accessible, and makes the possibility of a blow-out highly unlikely.
- You'll know your yeast is working because the bottle won't yeild to a squeeze after the second day. That's somrthing you can't test with a glass bottle.
- Do NOT go shaking the bottles after you put them up for fermentation. That crud settling at the bottom is the unwanted by-product of the daily life of yeast. Think: Garbage dump, septic, and cemetery all in one. Ewwwww.
- When you first unscrew the top of your ginger beer, there might be enough CO2 gas to lift some of that unwanted crap up from the bottom. Let the open bottles rest for about 5 minutes before pouring.
- It might stink a little when you open a bottle. Never mind that; It's a bit of by-product gas, and once you let the bottle air out a bit, it'll be ok.
- Make sure that you pour easily and infrequently from the bottle to avoid pouring any sediment into your drink. If you're big on presentation, consider pouring all your freshly-opened ginger beer into another bottle.
- If you've got surplus in an open bottle, re-cap tightly and store in the fridge. For best flavor you'll want to use that open bottle within a day or two. Likewise, a full sealed and chilled bottle should be consumed within a couple of weeks for best flavor.
- If all this yeast business is a turn-off, and you don't want to naturally carbonate the beer, you can bottle and refrigerate the cooled flavor base (don't dilute or add yeast!). When ready to consume, add club soda in a 3:1 ratio (e.g. a 12oz glass is 3oz flavor base and 9oz club soda).
Results: To help pay for college, I taught four
semesters if Introductory Biology Lab. One of the experiments we
performed in class contrasted aerobic vs. anaerobic fermentation.
Whereas the
latter was a simple yogurt recipe, the former produced ethyl alcohol
from bottled grape juice (that's wine, folks). The fermentation going
on here that gives the ginger beer its bubbles is really not so far off
from what was going on with the grape juice in that lab experiment.
Because a Champagne yeast is being utilized in this case, a potential
yield of up to around ten percent alcohol is possible; however unlikely
as the fermentation is stymied in the fridge after only a few days of
yeast-friendly temperatures. If you simply can't get
champagne yeast or the idea of bootleggin' scares you, the flavor base
diluted with club soda makes some mighty fine homemade ginger ale in
its own right.
That said, I still dig that “zing” that only fermentation can give each
spicy-sour sip. Although this ginger beer is great straight, my
favorite cocktail application has got to be a Dark and Stormy. A Moscow
mule is a close second (copper cup optional given the price).
Regardless of how you drink it, do-it-yourself ginger beer can
certainly add some new and unique drink options to to your bar arsenal.
Gallery:

Not sure how big of a hand of ginger to buy at the store? Here's your estimate.
Not sure how big of a hand of ginger to buy at the store? Here's your estimate.

These four ingredients are the core of the ginger beer flavor base. If you're doing it right, you'll taste all four in the finished product.
These four ingredients are the core of the ginger beer flavor base. If you're doing it right, you'll taste all four in the finished product.
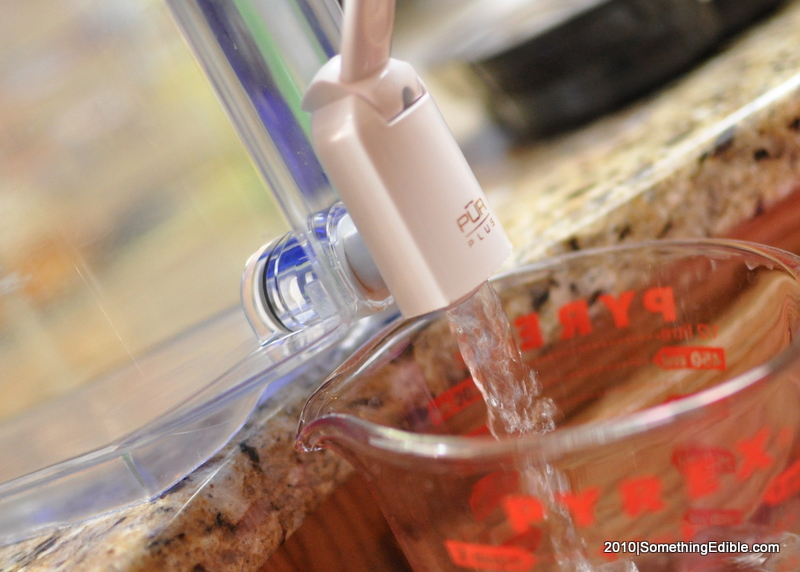
The chlorine in tap water has the potential to impart off-putting flavors, or even worse impede your carbonation. Use filtered water for best results.
The chlorine in tap water has the potential to impart off-putting flavors, or even worse impede your carbonation. Use filtered water for best results.
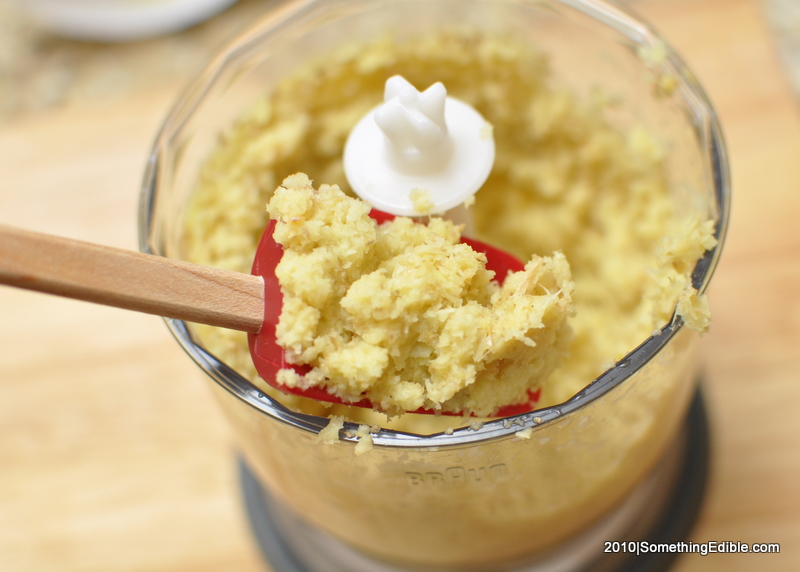
This is the consistency you're looking for when beating your ginger to a pulp.
This is the consistency you're looking for when beating your ginger to a pulp.
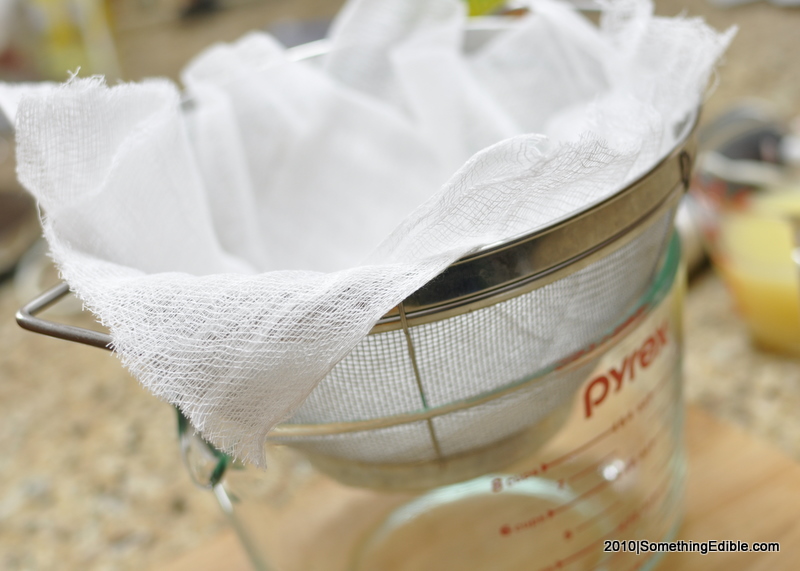
This setup works just fine for filtering the ginger pulp from the syrup. Use two layers of cheesecloth.
This setup works just fine for filtering the ginger pulp from the syrup. Use two layers of cheesecloth.
Never mind that the ginger syrup looks like swamp water. Once the lemon juice is added and it's diluted, it'll take on a rich golden color.
Never mind that the ginger syrup looks like swamp water. Once the lemon juice is added and it's diluted, it'll take on a rich golden color.

That ball of bay leaf and macerated ginger sure make a disposal smell real pretty.
That ball of bay leaf and macerated ginger sure make a disposal smell real pretty.
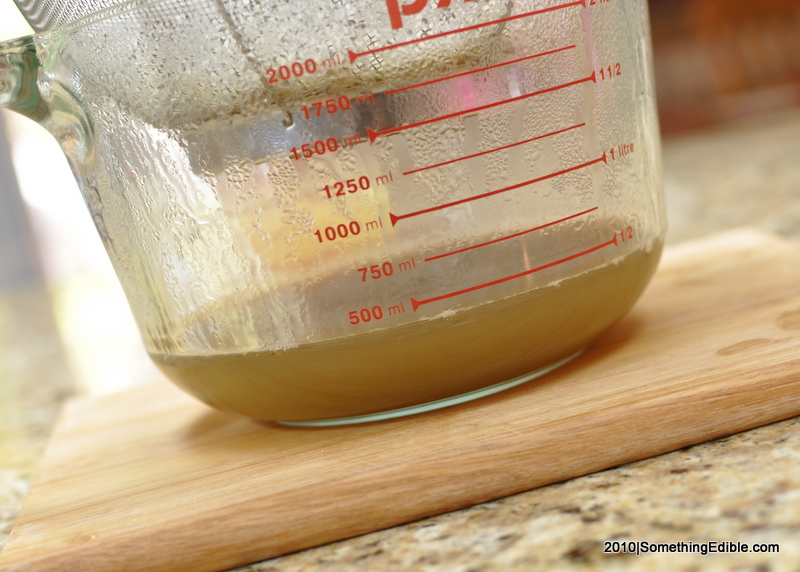
The diluted flavor base is ready for some Champagne yeast. In a couple of days it'll be bubbly.
The diluted flavor base is ready for some Champagne yeast. In a couple of days it'll be bubbly.

Just in case you don't know what to look for, allow my fabulous prize-pointer to show you what kind of Champagne yeast we're using for our ginger beer.
Just in case you don't know what to look for, allow my fabulous prize-pointer to show you what kind of Champagne yeast we're using for our ginger beer.

I know it ain't much, but this here yeast is plenty enough for both bottles.
I know it ain't much, but this here yeast is plenty enough for both bottles.
My ginger beer stayed on top of the fridge for a couple of days to ferment. I like this spot as it's consistently slightly warm.
My ginger beer stayed on top of the fridge for a couple of days to ferment. I like this spot as it's consistently slightly warm.

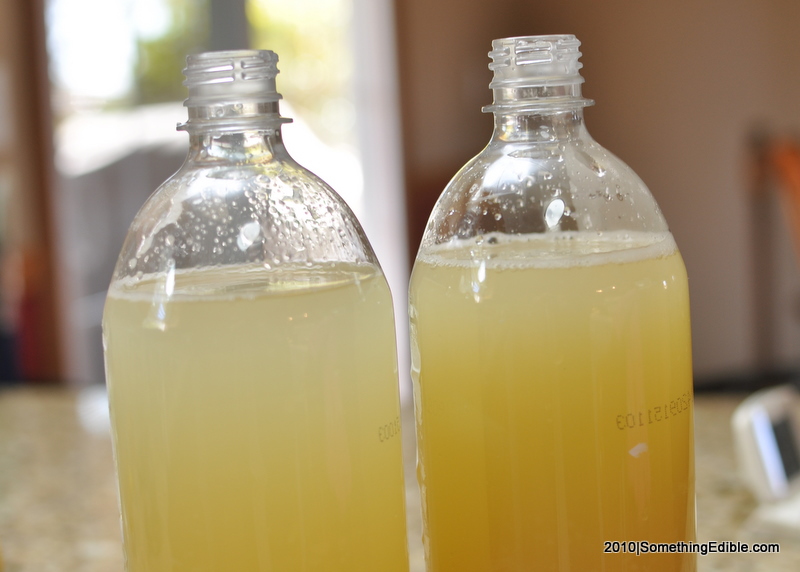
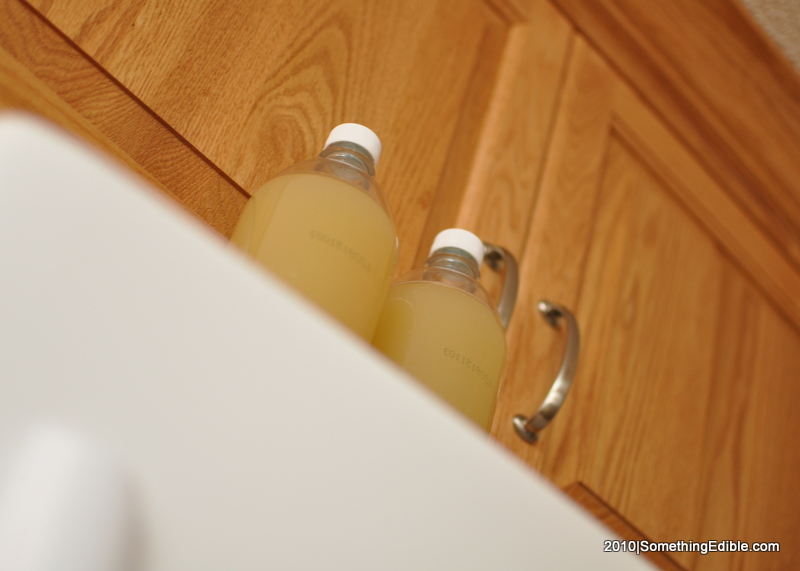
After two days' fermenting and one day in the fridge, this ginger beer is ready to drink. Pour easy so as not to stir up the crap at the bottom.
After two days' fermenting and one day in the fridge, this ginger beer is ready to drink. Pour easy so as not to stir up the crap at the bottom.
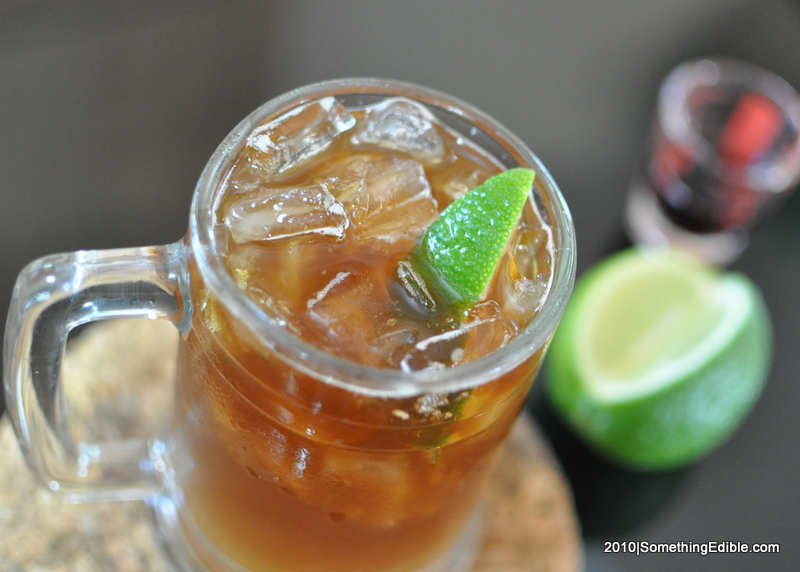
Ginger beer cocktail option No. 1: Dark and Stormy. The perfect…
Ginger beer cocktail option No. 1: Dark and Stormy. The perfect mix of dark rum and ginger beer.
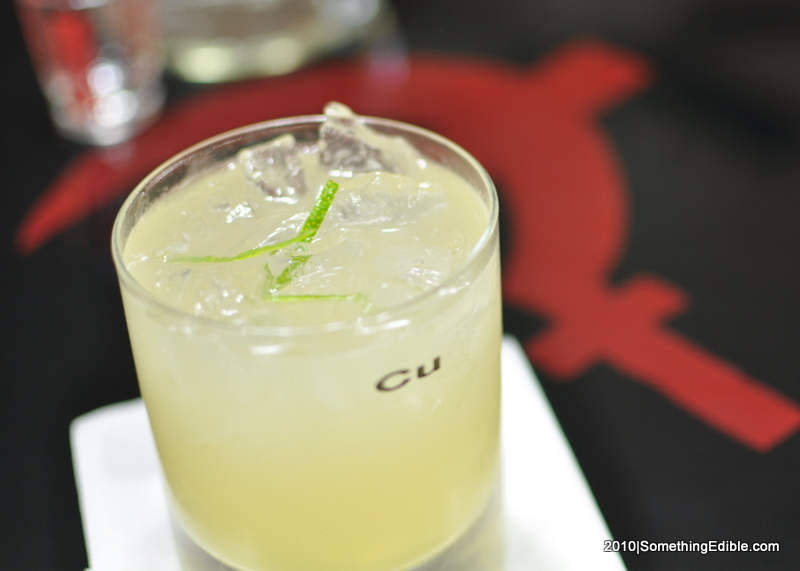
Ginger beer cocktail option No. 2: The Moscow mule. I don't care what…
Ginger beer cocktail option No. 2: The Moscow mule. I don't care what Oprah says; it doesn't need mint.
Get Social
Please wait while my tweets load...
Get the latest recipes and news. Join our Facebook page!


