
Some food, some drink.
The hardest part of DIY yogurt? Doing the Dishes.
Abstract: The cost of low-fat yogurt can be over 3 times the cost of milk, which is ironic because that's usually just about all it is. In a quest to get that perfect batch, I've tested (and ruined) enough dairy to learn what works and what doesn't. If you've ever had problems making yogurt at home, or have just been apprehensive about the prospect of trying, know that if you can read a thermometer and can do dishes, homemade yogurt is super-cinchy.
Purpose: We go through a lot of yogurt in this house. It's an absolute necessity for the kid's breakfast smoothies, and I use it in combination with mayo and/or sour cream to cut the fat and maintain flavor in many things I make. Quite often I can get plain yogurt on discount if I time it just right at the store. For some reason, dairy stock just doesn't turn over there & I can get it half-price at times. When you get spoiled on discount prices, it's a painful pill to swallow when you have to buy at full price. One week in particular, milk was on sale and cheap yogurt was nowhere to be had.
So,
let's make our own, right? I mean, I used to make it every semester
while schooling college biology n00bs about
lactic acid fermentation. I never really ate any
of that, though. Just the same, I
bought the milk and started researching proven methods that yield
edible results.
The primary and most helpful resource I found in my research was
www.makeyourownyogurt.com. It provided me a baseline by which to test my
method, and in turn come up with a procedure that consistently produces
a style of yogurt that's virtually indistinguishable from store-bought.
Recipe: Jump to the detailed recipe. (or, keep reading for the gist of it) -
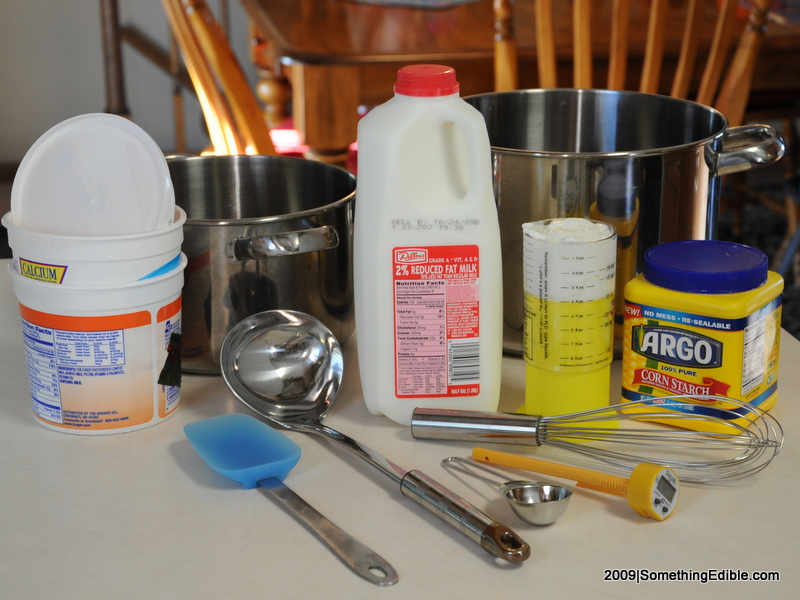
Supplies
Ingredients
Fill up the 8 qt pot half-way with water. Put on the heat & bring to a boil. Put anything that's gonna touch dairy in the boiling water and sanitize (not sterilize) for about 10 minutes. Obviously not a good idea to submerge your whole thermometer. To sanitize the smaller pot, flip it upside-down on the lager pot so the steam does the work & you don't make a mess with some scalding water.
When everything's pretty much clean, pull all the utensils out to dry on a clean towel, flip over the 4 qt pot, pour in the milk, and place the small pot into the 8 qt pot, double boiler-style. Reduce heat to medium-high (if it's not there already) and clip your thermometer onto the pot's edge. Now, we wait; stirring every couple of minutes with your spoonula, as to make sure that the least amount of funk accumulates on the bottom of the pot. While you're waiting, Measure out your 1/2 cup of plain yogurt and (separately, please) measure the cornstarch into a 1 cup liquid measure.
When the milk reaches ~ 140F, ladle out about 4 fluid oz. into a 1 cup measure with the cornstarch already in it (put the cornstarch in after the fact & there will be lumpyness). Whisk until integrated. and then return the slurry to the rest of the milk. Continue heating & stirring & checking the temperature. While that's going on, head on over to your sink, put the stopper in the drain and line the bottom of the sink w/ ice. When the milk reaches 185F, remove the pot form the double boiler & place on the ice in the sink. Start a trickle of water to move the heat away from the pot. As the sink fills, stir the milk & stir the sink water to speed up heat dispersion. Wait! not with the same spoon! Sheesh. Keep that milk clean!
When the temperature of the milk is 113F consistently throughout, take it out of the sink. Now pitch in the yogurt you've had standing by and whisk it in until completely integrated. Preheat your oven on it's lowest setting (mine's 175F) for 2 minutes and kill the heat. Meanwhile, ladle your proto-yogurt into the sanitized yogurt containers. Lid them up (they'll be pretty full) & pop them into the oven. Turn on your oven light and walk away for 12 hours. After 12 hours carefully extract your yogurt so as not to spill and transfer to the back of the fridge for a 24-hour respite. Consume freely the next day.
Observation: Many yogurt recipes call for a heating pad. These recipes also call for the heating pad to remain on for 12 hours. Have you bought a heating pad lately? They don't allow them to remain on for more than two hours at a go anymore. When I found this out the hard way, I was scrambling to look for someplace consistently warm. That's when it struck me to do it up easy-bake style. An incandescent bulb generates heat, so all I have to do is raise the temperature in an oven with a slight preheat, and the oven light will maintain that temperature, with the stove itself acting as my insulator. Your mileage may vary if your oven is some sort of super-fast-preheat-inferno-model. Mine takes about 8-10 minutes to preheat (sigh. sure would like a new oven). Take note of the way your particular oven acts as you don't want to cook your culture before it's had a chance to do wonderful things. At any rate, the oven method is a helluva lot less messy than running the risk of spilling cultured dairy on a device usually covered in fabric. Great way to leaven some dough too, btw.
The corn starch is totally optional, but I noticed that the store-bought stuff was using it as a thickener, and I wanted a bit more body in my yogurt. They also use pectin as well. As most store-bought pectin contains citric acid, and citric acid likes to coagulate milk proteins with the quickness, I would avoid using this unless you're trying to make farmer's cheese. It'll be good farmer's cheese to be sure (again, this is the voice of experience here); but this is not our desired end-result.
Results: Temperature
is key when making yogurt. Splurge
& buy that water-resistant digital thermometer. I think I
paid all of $15 for mine on sale. We heat to 185F for two reasons. Firstly, we do this in order to minimize the number of microbial critters that would compete with the yogurt cultures for food (the food being the milk sugars; i.e lactose). Albeit, with pasteurized milk, heating for this reason is less important. Secondly, the heat will start to relax those tightly-wound milk proteins, so that they get a chance to coalesce into that yogurt texture we're looking for as the cultures do their thing. To get that bit of firmness that most folks associate with store-bought, you gotta let the stuff cool down in separate containers undisturbed, hence the recycled quart containers. I haven't proved this scientifically or anything, but I reckon the proteins aren't quite done setting yet as the yogurt is moved to the fridge, and they need that time to get tangled back up again. One
might even be able to infer that they do this with the store bought
stuff to some degree as the the plastic
containers are almost always 5's which are a more heat-resistant
(and thereby less recyclable) plastic. All I know is that I get a
firmer yogurt if I don't transfer containers while it's still warm.
In short, blending for consistency after fermentation and/or before the overnight chill is right-out.
So what to do with this stuff? Smoothies of course, if you talk to my kids. Also love it with some homemade granola. As mentioned, I also like to strain yogurt and use it as a fat-replacer in many of my favorite dips and other cold applications that call for sour cream and/or mayo, though almost never exclusively, as I don't want to lose all my benefits of using a fat. Too lazy to strain? Me too. I usually draw yogurt from one side of the container without stirring, then it's “strained” itself for me the next time I get it out of the fridge.
Gallery:

Lactic acid fermentation force, assemble!
Lactic acid fermentation force, assemble!
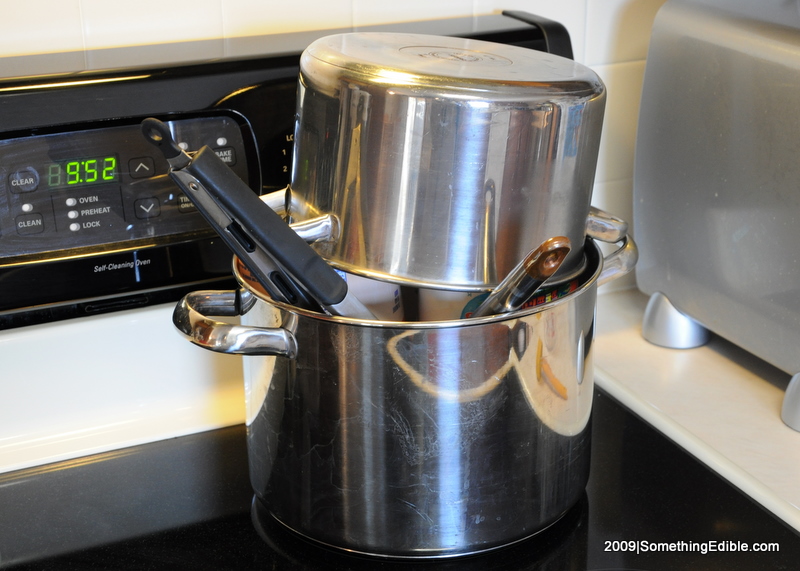
Sanitizing (not sterilizing) the utensils to give the good bacteria a fighting chance.
Sanitizing (not sterilizing) the utensils to give the good bacteria a fighting chance.
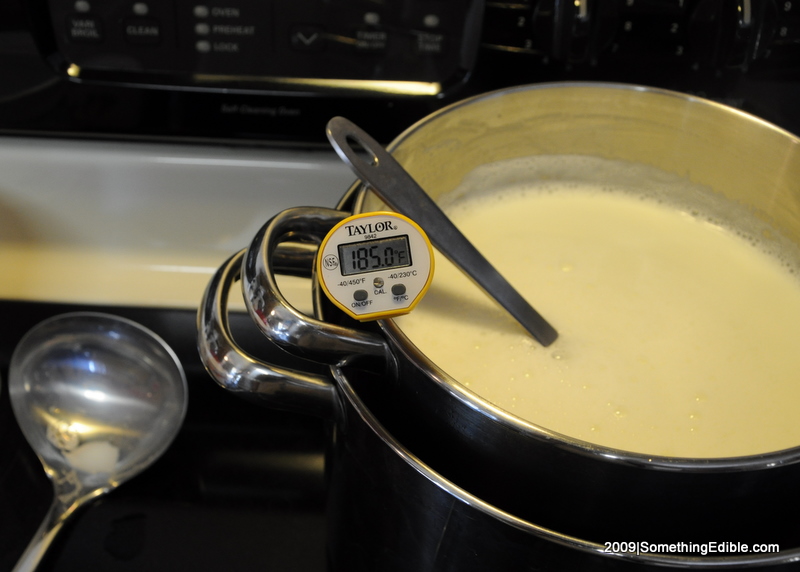
185F - the magic temperature that kills any microbial stragglers & ensures the proteins are thoroughly relaxed (That's 85C for those who use a more sensible…
185F - the magic temperature that kills any microbial stragglers & ensures the proteins are thoroughly relaxed (That's 85C for those who use a more sensible measure of temperature).
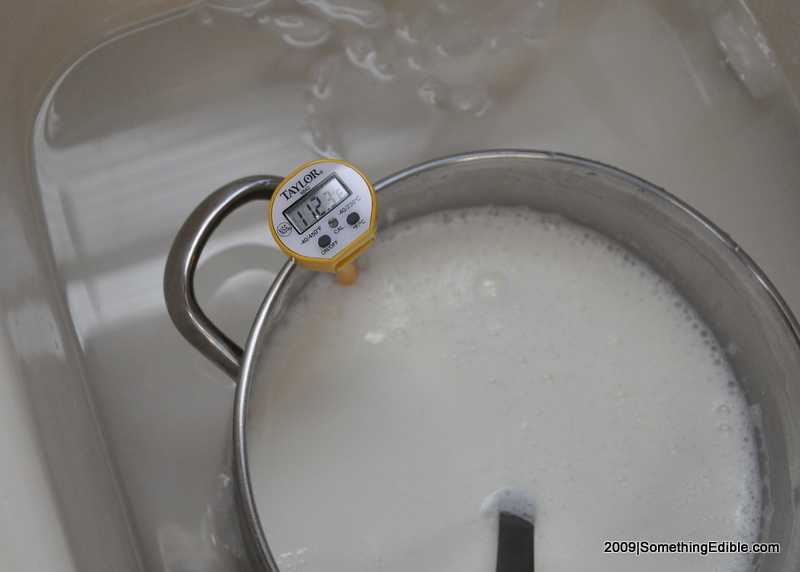
Conversely, we're just below 113F (45C). Ice bath with a trickle of water gets you there faster.
Conversely, we're just below 113F (45C). Ice bath with a trickle of water gets you there faster.

At 113F (45C), we can now pitch the starter (In the milk, not the trash. You have been keeping things clean, right? Sheesh.).
At 113F (45C), we can now pitch the starter (In the milk, not the trash. You have been keeping things clean, right? Sheesh.).
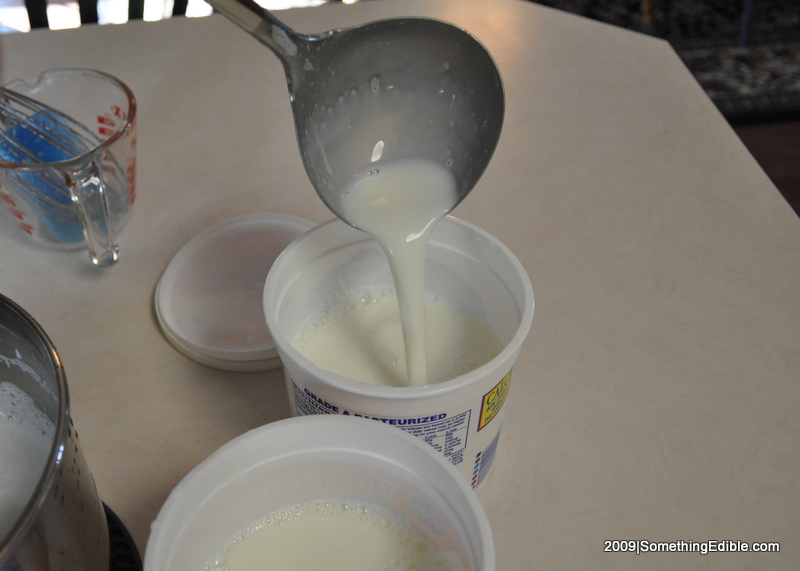
With the starter thoroughly mixed in, it's time to get it all packaged up. Two 32oz yogurt containers from the store-bought variety work really swell.
With the starter thoroughly mixed in, it's time to get it all packaged up. Two 32oz yogurt containers from the store-bought variety work really swell.

Proto-yogurt goes Into the oven, with only the light on, for 12 hrs. Please excuse the mess that is my oven. It gets used more than it gets cleaned.
Proto-yogurt goes Into the oven, with only the light on, for 12 hrs. Please excuse the mess that is my oven. It gets used more than it gets cleaned.
Get Social
Please wait while my tweets load...
Get the latest recipes and news. Join our Facebook page!


