
Some food, some drink.
RecipeBeta: Maple-Bacon Butternut Squash Sticks
Abstract: Beta recipes are my own experiments
that I've only tried once. Usually palatable, they often could be
better with a little tweaking - So please do, and let us know what
works!
Hot on the heels of the zucchini
coming in, our garden has blessed us with enough butternut
squash that I can afford to be a creative with minimal regret if I
happen to screw something up. With this particular experiment, I'm
pleased to say that ain't what happened. For this recipe, the
perfect amount of char is applied to two-bite fingers of roasted
squash that have been swaddled in bacon. To finish, I coated these
bright-orange beauties with a maple glaze infused with fresh sage
and a chile kick.
Purpose: I've always considered butternut
squash a treat where vegetables are concerned. Even prepared simply,
that vivid color alludes to a richer flavor than folks tend to
associate with squash. Where most squash applications look to use
the gourd as a medium to carry the flavor, butternut squash can
stand on its own; which means that big flavors won't drown out it's
earthy sweetness.
We used our oven very little when
growing up, deferring most often to the stove-top or microwave (hey,
it was the 80s!). So now given the choice, I tend to over-compensate
and apply “high and dry” heat to anything I can. Whether
to caramelize sugars, or to get that wonderful umami
that comes only from a Maillard
reaction, I love to brown my food.
This recipe is a browned-food
three-fer. We get our first layer of browned goodness from the
roasted squash; which is then wrapped up in a layer of browned pork
fat. To complete the chromatic flavor trifecta, a layer of
just-spicy-enough caramelized maple sugar brings the whole wonderful
mess together.
Recipe: Jump to the detailed recipe. (or, keep reading for the gist of it) -
The Glaze
The Seasoning
The Squash
For the glaze, bring jalapeno, sage and syrup just to a boil in a small saucepan over medium heat. Reduce heat to low and continue to simmer for 10 minutes.
For the butternut squash, preheat oven to 425F. Split each squash transversely at the beginning of the bulbous area where the seeds begin. Peel and cut the seedless end into 4-5 inch long sticks that are roughly a square inch thick. Wrap each squash stick with a half-strip of bacon and place on a wire rack nested in a pan (to catch the ensuing greasy mess). Season with the salt and pepper blend to taste (you probably won't use it all). Roast for 15 minutes, remove from the oven and brush liberally with the maple glaze. Roast for another 15 minutes, taking care to brush on more glaze at the 7.5 minute mark and finally as the squash comes out of the oven. Let rest 5-10 minutes before serving. Garnish with any additional maple glaze.
Observation:
- Use the thicker flesh of the seedless end of the butternut to make your sticks, and save the thinner meat of the seed-laden end for other applications.
- For a pound of squash sticks, you'll need the seedless portions of approximately two medium (two-pound) butternuts; that's about four pounds of unprocessed squash.
- On breaking down the vegetable of interest: separate the seedless end from the bulb with a heavy knife or cleaver and then proceed to remove the peel with a vegetable peeler or serrated knife. If you use a peeler, it might take a couple go-'rounds.
- If you have a convection setting in your oven, I'd use it, as it can only help to facilitate browning. For my oven, that means wheeling back the temperature to 400F for the same amount of time.
- Pleeeeeease use real maple syrup for the glaze. If you just don't have any, a third-cup of brown sugar with a couple of tablespoons of water will probably still taste better than pancake syrup.
- I like the red (ripe) jalapenos for this, as the heat tastes less raw to me. Just make sure to get the seeds and placenta out of there, as we we're shooting for subtlety here.
- I'd let your sticks rest five minutes before removing them from the rack and serving. Otherwise, they'll be more liable to fall apart on the way to the plate. Plus, no one really cares for steam burns from a mouthful of still-cooking squash.
Results: The great thing about roasting this
particular vegetable is that you get a thin layer of smoky-brown
flavor that encapsulates that almost-fluffy packet of subtly sweet
butternut squash. I bet this application would be good with (pie)
pumpkin and maybe even sweet potatoes as well. Given the fact that I
didn't hose it up in the predictable confines of the oven, a grilled
variant might also be a possibility.
I'm really pleased with the way this
experiment turned out. So pleased, in-fact that couldn't help myself
and ate all sixteen ounces of squash in one go <burp>. About
half-way through, I instinctively ditched the fork and found myself
licking my fingers to savor every bit of spicy-sweet flavor. If you
have a thing for butternut squash, and you have to share, it might
be a good idea to double this dish. ![]()
Gallery:

Today's subject of oven-roasted affection: a four-pound butternut squash. We had a mess of rain a couple of weeks back, and so my squash got big in a hurry.
Today's subject of oven-roasted affection: a four-pound butternut squash. We had a mess of rain a couple of weeks back, and so my squash got big in a hurry.
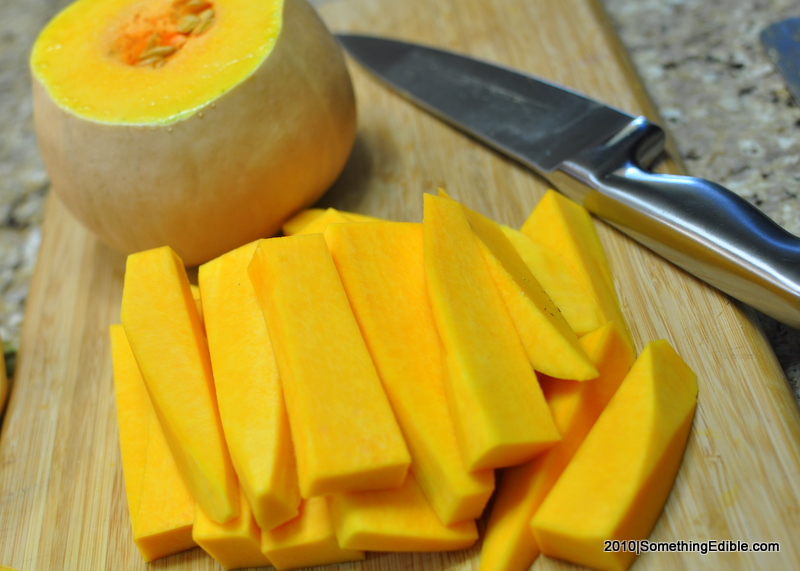
Here's what the seedless end of my butternut squash looked like after I tore it down. Save the seed-laden end for another day.
Here's what the seedless end of my butternut squash looked like after I tore it down. Save the seed-laden end for another day.
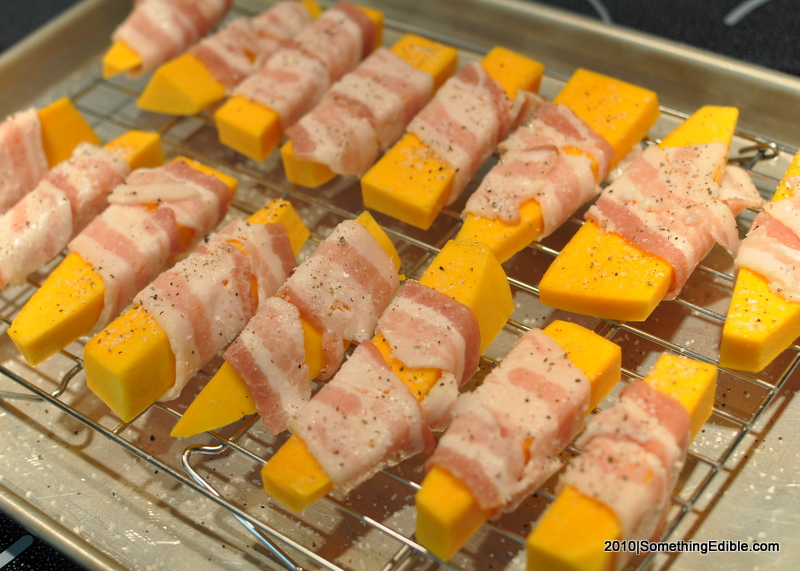
The squash sticks have been vested with bacon and a little salt and pepper. We're ready for a judicious application of high + dry heat (that's roasting).
The squash sticks have been vested with bacon and a little salt and pepper. We're ready for a judicious application of high + dry heat (that's roasting).

Three simple ingredients brought together by ten minutes of gentle heat yield some remarkable flavor. Use what you don't glaze with for drizzling and dipping.
Three simple ingredients brought together by ten minutes of gentle heat yield some remarkable flavor. Use what you don't glaze with for drizzling and dipping.

The finished butternut squash sticks, resting out of the oven. Man, that sheet pan's gonna be a bitch to clean. I really shoulda used some aluminum foil.
The finished butternut squash sticks, resting out of the oven. Man, that sheet pan's gonna be a bitch to clean. I really shoulda used some aluminum foil.
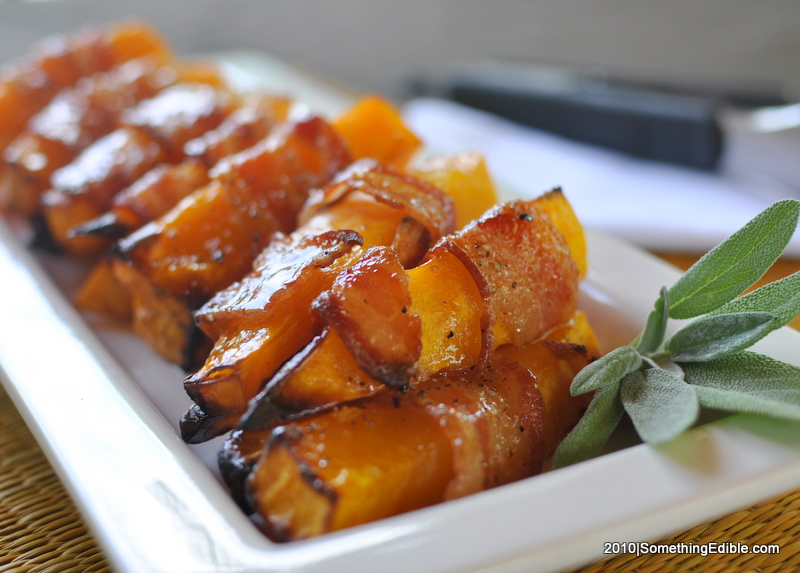
Five minutes after this photo was taken, this whole plate of Maple-Bacon Butternut Squash Sticks was decimated by yours truly. They were really good!
Five minutes after this photo was taken, this whole plate of Maple-Bacon Butternut Squash Sticks was decimated by yours truly. They were really good!
Get Social
Please wait while my tweets load...
Get the latest recipes and news. Join our Facebook page!


